
Printable Planner Tips for Beginners: Start Strong
Using a printable planner is a fantastic way to stay organized, track your goals, reflect on your progress, and build better habits. But if you’re just getting started, it can feel overwhelming. To help you set up and use your planner effectively, follow this step-by-step guide.
This post may contain affiliate links. I would never recommend a product that I do not truly love. The price does not increase for you. Thanks for supporting Sunflower Child Designs. See my disclosure for more info.
Step 1: Determine Your Planner’s Purpose
Before you print or assemble your planner, decide how you plan to use it. This will help you choose the right pages and prevent unnecessary clutter.
Common Uses for Your Planner:
Planning and Goal Tracking – For structuring your daily/weekly/monthly schedule, tracking goals, and building habits.
Collection Pages – For one-time or reference pages, such as cleaning schedules, reading logs, important documents, and planting charts.
Memory Keeping and Reflection – For journaling, gratitude, and capturing memories.
Your planner can serve multiple purposes, but be mindful of how many pages you can realistically maintain.
Step 2: Choose the Right Planner for You
Some key things to consider:
Size: Do you prefer a full-size US Ltr (8.5 x 11 inches), A4, or a compact A5 size?
If you're new to printable planners, sticking with your standard printer paper size is the easiest option. In the US, this is US Letter (8.5 x 11 inches), which avoids the hassle of adjusting printer settings.
Layout: Do you like a structured format or more open-ended pages?
Theme: Minimalist, colorful, professional—choose what resonates with you.
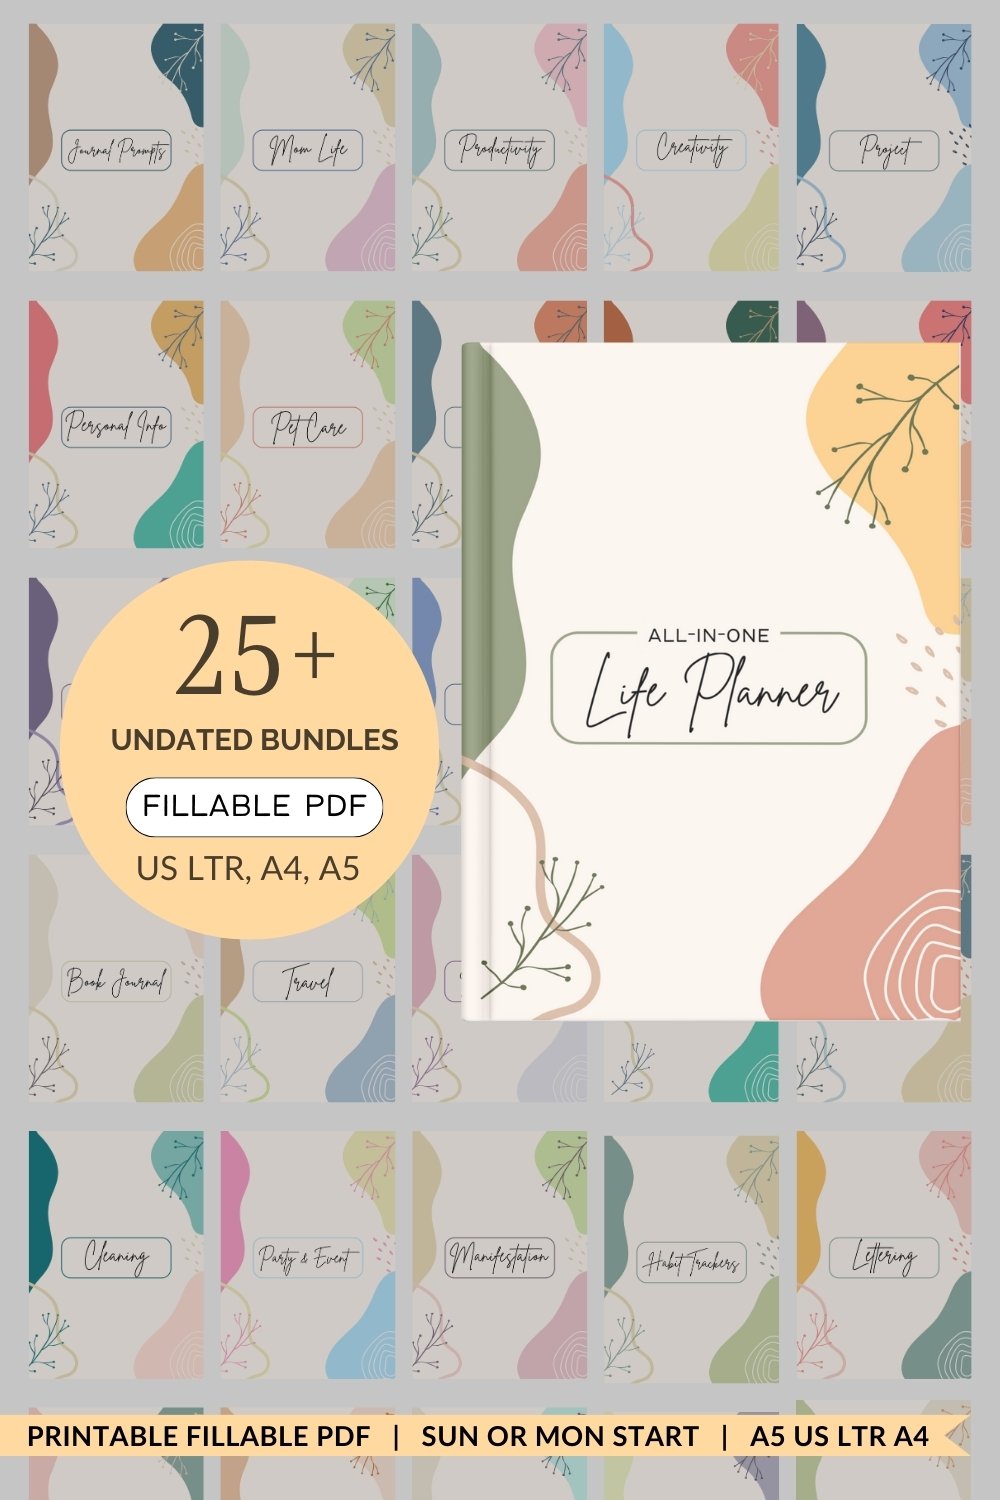
For a well-rounded planning experience, I recommend using the All-in-One Life Undated Planner. It’s designed to be flexible, allowing you to focus on what matters most while keeping everything streamlined. There are over 25 categories to get you started. This allows you to try out many different layouts and pages without breaking the bank. This planners comes in sizes US Ltr, A5 and A4.
Step 3. Pre-Fill Desired Pages and Choose Pages to Print
If you’re using a fillable planner, consider pre-filling recurring details such as habits or to-dos before printing. This saves time for things like a weekly habit tracker because the habits will already be written each time you print the page. You will not have to hand write them in each week.
Highlight Your Focus Areas on the Planner Index Page (if applicable)
If you grabbed the All-in-One Life Undated Planner print the Planner Index Pages and scan through each section. Highlight the top 2-3 pages in each section that align with your planner’s purpose. This will help you stay focused and avoid printing unnecessary pages.
Suggested Pages to Print Based on Purpose:
Weekly Planning and Goal Tracking
Recommended Pages: Daily, weekly, or monthly planners, habit trackers, meal and fitness pages, financial tracking pages.
How Many to Print: Start with one or two months’ worth to test the layout. For weekly pages, print at least 5 per month but no more than 15 to start.
Collection Pages
Recommended Pages: Cleaning schedules, meal ideas, home project trackers, financial pages, pet care logs, etc.
How Many to Print: 10-15 total pages to use as master lists or references.
Memory Keeping and Reflection
Recommended Pages: Gratitude journals, event pages, journal prompts, dream journals, travel memories.
How Many to Print: 2-4 pages per month, adding more as needed.
Step 4. Print Your Planner Pages Correctly
Printing your planner pages properly ensures they look polished and professional. Follow these tips for high-quality prints:
Printer
If you are looking for an inexpensive printer the below are great options. Please keep in mind that the printer makes all the difference, some printers are very low quality and the ink will look blotchy.
HP OfficeJet 8015e Printer - prints up to 28lb paper (104 GSM), has duplex printing, borderless
HP DeskJet 3755 compact but only prints up to 20lb paper (75 GSM) no duplex, no borderless
Paper
Recommended Paper Thickness for Printable Planners
Choosing the right paper for your printable planner can make a big difference in durability, writing experience, and overall presentation. Here are the best options based on your needs:
a. Standard Paper (20–24 lb / 75–90 gsm)
Best for: Basic planner pages, everyday use, budget-friendly printing
Pros: Widely available, works well with most home printers, cost-effective
Cons: May cause ink bleed-through with gel pens or markers, less durable for frequent handling
b. Premium Paper (28–32 lb / 105–120 gsm)
Best for: High-quality planner pages, color printing, reduced ink bleed
Pros: Thicker, smoother feel, holds up well to frequent use, minimal ghosting or bleeding
Cons: Slightly more expensive, may require higher printer settings for proper feeding
c. Cardstock (65–80 lb / 175–216 gsm)
Best for: Covers, divider pages, specialty planner sections
Pros: Sturdy, professional look, prevents wear and tear on frequently accessed pages
Cons: May not work in all home printers (check your printer’s specifications), higher ink usage
Choosing the Right Paper for Your Needs
For everyday planner pages: Go with 28–32 lb for a premium feel without bulk.
For pages that require more durability: Opt for 32 lb or lightweight cardstock (40–60 lb).
For covers or dividers: Use 65–80 lb cardstock for extra sturdiness.
Print Settings
Page Size: Choose the correct page size in your printer settings—US Letter, A4, or A5—based on your paper type.
Scaling: Set scaling to 100% or "Actual Size" to prevent resizing.
Print Quality: For the best results, especially with color prints, select "Best" or "High Quality" in your print settings.
Borderless Printing
Borderless printing removes white margins, making it ideal for planners with full-page designs or colorful layouts.
Adjust your print settings to “Borderless” or “Edge-to-Edge” (options vary by printer).
Borderless printing may not work on black-and-white prints with regular paper. If needed, select a thicker paper (even if using standard paper) and turn the color setting on.
Note: Not all printers support borderless printing.
Printing on Thicker Paper
Using heavier paper (28–32 lb) enhances durability and gives your planner a premium feel.
Ensure your printer can handle thicker paper, as some models struggle with cardstock or heavy-weight paper.
If using specialty paper, select the appropriate paper type in your print settings to avoid jams.
Double-Sided Printing
If your planner is designed for double-sided printing, make sure your printer supports duplex printing and test how pages flip.
Learn which direction to flip the page when manually printing on the back to maintain proper alignment. You can write the correct direction on a sticky note near your printer or keep a demo page with instructions on it nearby.
Test Print First
Before printing a full batch, print a single test page to check alignment, colors, and formatting. This helps you avoid wasting paper and ink.
Step 5. Bind Your Planner for Durability and Ease of Use
Once your planner pages are printed, binding them ensures they stay secure, organized, and easy to use. There are several options, but the easiest and most beginner-friendly method is using a three-ring binder. It requires no special tools, allows for easy page removal and addition, and is widely available.
Three-Ring Binder (Recommended for Beginners)
Why it’s best: Simple, affordable, and requires no extra equipment.
How to use: Print your planner pages, punch them with a standard three-hole punch, and place them in a binder.
What to look for: Choose a sturdy binder with metal rings that open and close easily. For frequent use, a binder with reinforced edges and a locking mechanism is ideal.
Sizes: Available in A5, US Ltr (8.5 x 11 inches), and A4, making it a versatile option.
Recommended Binders and Hole Punches
US Letter (8.5" x 11") – Standard for Printing & Note-Taking
Binder: EYROZILL Store Binder (Available in 2-inch or 1-inch sizes) – A beautiful, sturdy design with pockets and a built-in clipboard for added convenience.
Hole Punch: EXPUTRAN Store 3-Hole Punch – Acrylic and gold standard design, perfect for clean, precise punching.
A4 (8.27" x 11.69") – Common for International Users
Binder: 1.5-inch or larger binder for more capacity and durability.
Hole Punch: Standard 3-hole punch that fits A4 pages.
A5 (5.83" x 8.27") – Ideal for Compact Planners & Notebooks
Binders:
1-inch 3-Ring Binder – A compact, stylish choice.
1.5-inch 3-Ring Binder by 2Fold – Offers extra capacity while remaining portable.
2-inch 3-Ring Binder Deluxe Quickfit – Great for those who need more storage.
Hole Punch: Russell+Hazel Acrylic Mini 3-Ring Hole Punch – A sleek, 3-hole punch (not 6-hole) option, allowing you to fit more A5 pages instead of limiting yourself to traditional A5 6-ring systems which allows less pages.
Staple or Clip Binding (Simple and Temporary)
What it is: A quick method for keeping pages together without commitment.
How to use:
Stapling works for planners under 30 pages .
Binder clips or paper clips work for small sections or temporary planning inserts.
Who it’s best for: Those who want to test out a planner layout before committing to a more permanent binding method.
Other Binding Options (Not Recommended for Beginners)
While a three-ring binder is the easiest and most flexible option for beginners, there are other ways to bind your planner. These methods require special tools or external services, making them less beginner-friendly.
Disc-Bound System – Uses plastic or metal discs with special hole punches (e.g., Happy Planner, TUL, Levenger). Great for flexibility but requires proprietary equipment.
Spiral Binding – A permanent, notebook-style binding done at print shops or with a spiral binding machine. Ideal for planners that don’t need page rearrangement.
Coil or Comb Binding – Similar to spiral binding but allows for some page adjustments. Requires a binding machine or print shop service.
Since these methods involve extra tools or professional services, we recommend starting with a simple three-ring binder before exploring more advanced options.
Final Thoughts on Binding Your Planner
If you want the easiest, most beginner-friendly option → Go with a three-ring binder.
If you just need temporary binding → Stapling or clips are quick fixes.
If you want a permanent, polished look → Spiral or coil binding works best.
Step 6: Build Your Routine
Once your planner is set up, establish a consistent routine to make the most of it.
Set a Reminder
Add an alarm on your phone to remind you to check your planner. You can set it to go off daily, weekly, or monthly to build the habit.
Keep Your Planner Visible
Leave your planner in a place where you’ll see it daily—your desk, bedside table, or kitchen counter—so it’s easy to access and use.
How to Use Your Planner Effectively:
Weekly Planning – Set aside 15-20 minutes each week to plan schedules and update trackers. Choose a designated time, such as Sunday evenings.
Collection Pages – Use these pages as needed and update them weekly, monthly, or seasonally.
Memory Keeping – Spend time each week capturing reflections, gratitude, or journaling moments.
Step 7: Adjust and Expand as Needed
Each month, reflect on how well your planner is working for you:
Add more weekly or daily pages if you need additional planning space.
Expand your collection pages based on new interests or priorities.
Print extra memory-keeping pages to continue capturing important moments.
Tip: Keep your planner flexible! Print only what you need for a month or quarter at a time, and customize it as you go.
Tips for Success
Blend Digital and Paper Tools
Using digital tools alongside your paper planner can help streamline tasks and organization. If you already rely on a digital calendar such as Google Calendar, do not replicate it in your journal. Focus on unique, helpful pages that complement your planning system. Some things are simply better digital, like always having access to your account logins on the go, recurring tasks, quick lists, and automated reminders—while others work best on paper, such as goal-setting, journaling, and habit tracking. This balance helps minimize unnecessary pages in your printable planner while keeping everything efficient. Try these free tools to enhance your planning experience:
Bitwarden – Securely tracks accounts, cards, and passwords.
AnyList – Effortlessly save recipes from the web and generate smart grocery lists that automatically categorize your items for easy shopping.
Empower – Keeps all your spending in one place, making budget tracking effortless. Easily update your paper weekly or monthly budget tracker with accurate, up-to-date insights.
Todoist – Ideal for daily task management on the go. Grab two free months of Pro to unlock advanced features. Once signed up, try the “Last Time I” template—it includes recurring reminders for essential tasks like changing your air filter, so you never miss a maintenance check!
Tip: Add the quick-add widget to your lock screen for easy task entry!
Start Small
Begin with just a few key pages instead of printing your entire planner all at once. This prevents overwhelm and allows you to gradually build your system.
Use One-Page Trackers
Opt for pages that combine multiple elements, such as a monthly habit tracker instead of a weekly one. This reduces flipping between pages and keeps everything streamlined.
Reflect and Adjust Monthly
At the start of each month, take 5-10 minutes to review what’s working and what’s not:
Remove unused pages.
Add new sections if needed.
Adjust layouts to better fit your planning style.
By staying flexible and making adjustments, you’ll create a planner that grows with you and supports your productivity, goals, and lifestyle.
Use Repositionable Tabs for Easy Organization
Keep your planner organized with repositionable tabs. These sticky or snap-in tabs allow you to mark important sections, such as monthly spreads or goal-setting pages, and can be easily moved as your planner layout evolves. They're perfect for quick access and keeping your planning system flexible!
OPTION: Use Planner Digitally
If you prefer, you can upload any PDF planner to a note-taking app such as GoodNotes, Evernote, or Notability on a tablet. This allows for note-taking, highlighting, and adding images while keeping pages clean and reusable. Keep in mind that rearranging pages is difficult.
Recommended Supplies for Printable Planners
Recommended Everyday Pens and Tools - All on Amazon
Pens
Pilot Precise V5 Extra Fine Point 0.5 mm: Great for smooth writing, an everyday pen
Muji Gel Ink Ballpoint Pen (0.38mm): is loved for its ultra-fine tip, which makes it perfect for detailed notes, clean lines, and small handwriting
Brush Pens
Small Brush Pen 62039 Fudenosuke Brush Pen - great for hand lettering
Big Brush Pen: Tombow Dual Brush Pens - great for hand lettering
Supplies
(16 Pack) Sticky Notes 3x3, Vintage Colors - great when you need extra room on a page
Avery Ultra Tabs - to mark you favorite pages and label sections
Clear Ruler: If you plan on exploring your creativity with customized pages
Crayola Super Tips - if you plan on coloring
Printers
HP OfficeJet 8015e Printer - prints up to 28lb paper (104 GSM), has duplex printing, borderless
HP DeskJet 3755 compact but only prints up to 20lb paper (75 GSM) no duplex, no borderless
Paper and Binding Supplies
US Letter (8.5" x 11"): Standard size for printing and note-taking.
HP Paper All In One 22 lb | 207750R - a great paper for adding to binder, heavier than standard copy but not too heavy. No bleed if printing on both sides
Binder: EYROZILL Store Binder (Available in 2-inch or 1-inch sizes) – A beautiful, sturdy design with pockets and a built-in clipboard for added convenience.
Hole Punch: EXPUTRAN Store 3-Hole Punch – Acrylic and gold standard design, perfect for clean, precise punching.
A4 (8.27" x 11.69"): Common size for international users.
a 1.5in or larger Binder
3 or 4 hole punch depending on the binder you choose
A5 (5.83" x 8.27"): Ideal for smaller notebooks or planners.
A5 Printer Paper - 70lb Text (105 gsm) Bright White Paper (make sure your printer can handle this thick paper)
Binders:
1-inch 3-Ring Binder – A compact, stylish choice.
1.5-inch 3-Ring Binder by 2Fold – Offers extra capacity while remaining portable.
2-inch 3-Ring Binder Deluxe Quickfit – Great for those who need more storage.
Hole Punch: Russell+Hazel Acrylic Mini 3-Ring Hole Punch – A sleek, 3-hole punch (not 6-hole) option, allowing you to use bigger binders for A5 pages instead of limiting yourself to traditional A5 6-ring systems. note: use a 3 ring Binder (NOT 6 ring it ends up being too small)
Final Thoughts
A printable planner is a powerful tool when used consistently and customized to fit your life. Start small, stay consistent, and adjust as needed. Over time, you’ll develop a routine that works for you and turn your planner into a trusted system for organization, goal tracking, and reflection.
Now it’s time to start planning and make the most of your printable planner!
Grab the All-in-One Life Undated Planner today—your go-to tool for organization, memory keeping, reflection, and planning. With collection pages, guides, and references, it’s designed to help you stay on track and inspired!
Frequently Asked Questions:
-
Click here for the All-in-One Life Undated Planner.
-
Yes! This is a printable planner, meaning you can print only the pages you need and use them in a binder, disc-bound system, or even as loose sheets. The planner also includes print guides to help you get the best quality prints.
-
Absolutely! While it is designed as a printable planner, you can also use it digitally on apps like GoodNotes, Notability, or any PDF annotation tool for a paperless experience.
-
The planner is designed for U.S. Letter (8.5 x 11 inches), A4, and A5 sizes, giving you flexibility in how you use it. You can choose the size that best fits your needs, and if needed, adjust your printer settings to scale it accordingly.
-
Yes! The planner includes blank templates, lined paper, dot grid pages, and more, allowing you to add personal notes, sketches, or additional sections that fit your needs. Plus, vital sections are available as fillable PDFs, so you can conveniently type and organize information digitally before printing or using it on a tablet.
-
Definitely! Whether you’re new to planning or an experienced planner, this undated, flexible system allows you to start small and expand as needed. A Quick Start Guide is included to help you navigate the sections.
-
That’s the beauty of this planner! You only print and use the sections that work for you. Some people may focus on habit tracking, while others use it for goal setting, self-care, or journaling—it's designed to adapt to your lifestyle.
-
Yes! The planner includes a variety of guided prompts and challenges, such as the 30-Day Self-Care Challenge, 75 Soft & Hard Challenge, Gratitude Challenge, and various journaling exercises for self-reflection and motivation.
-
This planner is for personal use only, meaning you cannot resell or distribute it. However, you can purchase additional copies for family, friends, or colleagues who might also benefit from it.
-
Once you complete your purchase, you will receive a download link where you can access all the planner pages immediately. From there, you can print or use it digitally!
📌 Sharing is caring! Thanks for supporting and helping this blog grow—pin your favorites and spread the inspiration!


- A - Guides
- April bullet journal ideas
- Bullet Journal
- December Bullet Journal Ideas
- Productivity systems
- Todoist tips
- august bullet journal ideas
- best pens for journaling
- brush pen calligraphy
- budgeting
- bullet journal setup FULL YEAR
- elf kit
- february bullet journal ideas
- fitness
- fluff prompts
- free printables
- habit tracking
- hard cover planners
- how to bullet journal for beginners
- january bullet journal ideas
- july bullet journal ideas
- june bullet journal ideas
- manifestation journaling
- march bullet journal ideas
- may bullet journal ideas
- modern calligraphy alphabet
- november bullet journal ideas
- october bullet journal ideas
- planner binder
- pregnancy
- printable holiday planner
- printable planner pages
- printable stickers
- september bullet journal ideas
- setup from scratch
- stranger things
- tarot
- witchy
- witchy bullet journal ideas